How to Install an SSL Certificate on Microsoft Office 365 using IIS
AboutSSL brings you an easy and super-quick guide on how to install SSL Certificate on Microsoft Office 365
 Office 365 developed by Microsoft is a combination of Microsoft’s productivity and service software. It includes software and services such as Microsoft Office, OneDrive, Skype. Basically, it brings together the different software and services in one place providing ease of management and ultimately boosting productivity. There are different plans available based on your needs. It means that the individuals, as well as businesses, have the privilege to select the plan based on their needs.
Since its launch back in 2011, its popularity has grown by leaps and bounds. Recently, we have been getting a lot of questions from our readers on how to install an SSL certificate on Office 365. Well, we’re always here to help you. Follow our detailed step-by-step guide to bolster your data-security using an SSL certificate.
Let’s get started.
Voila! You have just installed an SSL certificate on your website!
A Step by Step Guide to Install SSL Certificate on Microsoft Office 365 using IIS
- First, open the Zip file that your certificate authority sent you via mail. Now, save the SSL certificate file (yourdomainname.cer) to the desktop of your ADFS server.
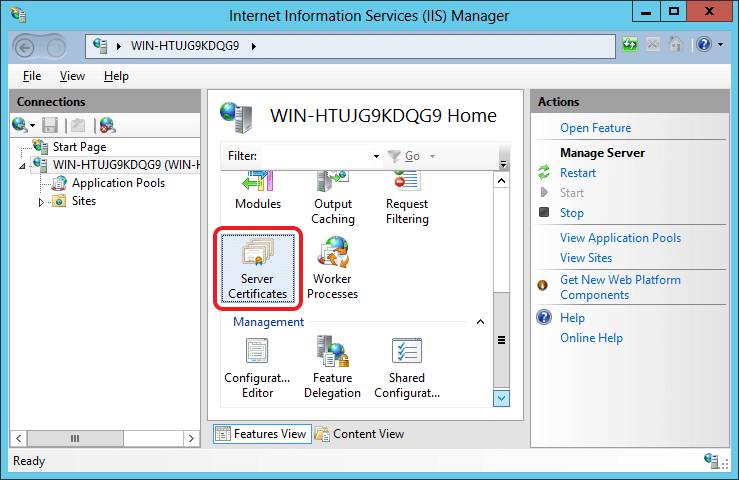
- Now, open Internet Information Services (IIS) Manager from the Start.
- In the IIS Manager, find Connections panel on the left-hand side. Double-click on Server Certificates icon in the middle panel as shown in the below image.
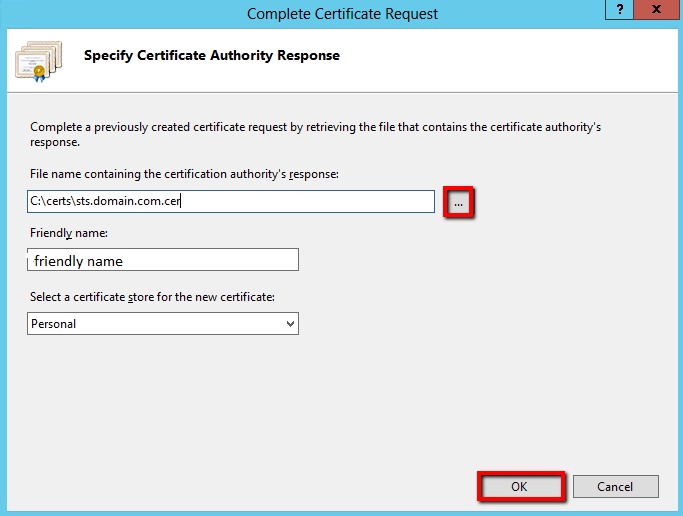
- Click on Complete Certificate Request in the Actions panel on the right-hand side of your screen. On doing it, “Complete Request Certificate” window will open up.

- Under File name containing the certification authority’s response, enter or browse the path of the .cer file that you saved earlier.
- In the Friendly name field, type the name you want the certificate to be commonly known as.
Note: This is just a casual name. It is not a part of the SSL certificate. It is used just for easy reference.
- Select Personal in Select a certificate store for the new certificate drop-down.
Assign the Certificate to the Website
- Again, open the IIS Manager. Select Sites in the Connections panel of the left-hand side. Now, double-click on the Default Web Site.
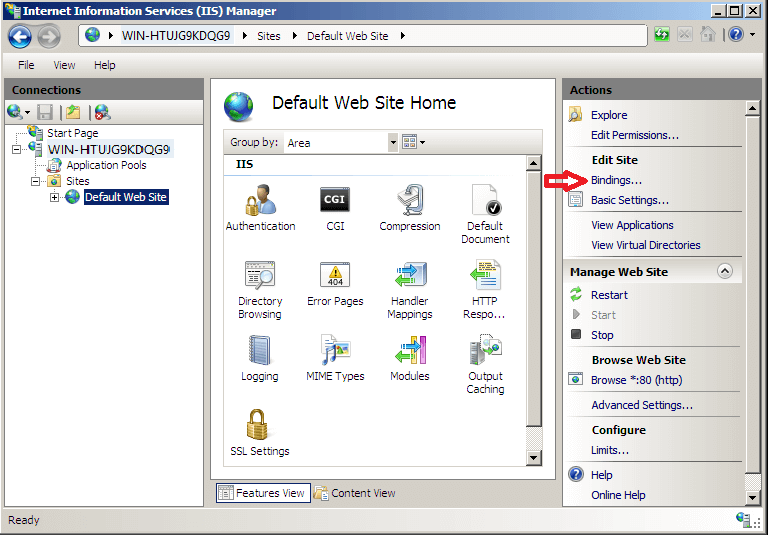
- In the Actions menu under Edit Site, open Bindings.
- Click on Add.
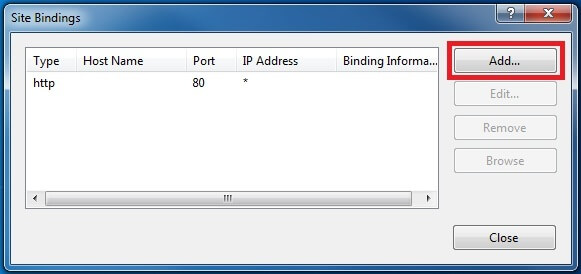
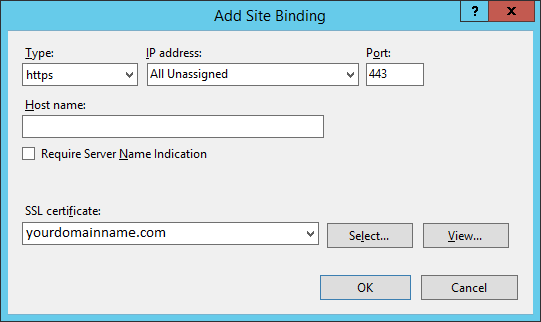
- You should see Add Site Bindings window now. Enter the following information before clicking the OK button.
Type: HTTPS
IP Address: All Unassigned
Port: 443
SSL Certificate: Select the Friendly Name of the SSL certificate that you entered before.
Voila! You have just installed an SSL certificate on your website!
95%OFF
Comodo Positive SSL
78%OFF
RapidSSL Certificate
95%OFF