Guide to Fix Error Code – DNS_PROBE_FINISHED_NXDOMAIN
Some are common, and some are entirely unheard of. The commonly faced Google Chrome error DNS_PROBE_FINISHED_NXDOMAIN is one among the big pool of Google Errors, which can be somewhat annoying.
Before we jump into what’s this Google Chrome error, DNS_PROBE_FINISHED_NXDOMAIN is all about, first, let’s understand what’s DNS.
What’s DNS?
So, whenever you enter the site’s URL, DNS (Domain Name System) gets in between to connect that website with its actual server’s IP address. Put simply, it’s DNS, which helps to transfer to the IP (Internet Protocol) Address based system by using human-friendly names. It gives benefits to users to use internet resources like a website without remembering IP addresses or port numbers.
Moreover, this process is known as DNS name resolution, which involves a DNS recursor, which queries different nameservers for finding out the real IP address of the website’s server.
What is DNS_PROBE_FINISHED_NXDOMAIN?
DNS_PROBE_FINISHED_NXDOMAIN is one of the Google chrome errors, which indicates the failure of the DNS lookup. In this error message, NXDOMAIN stands for Non-Existent Domain.

How to Fix Google Chrome Error DNS_PROBE_FINISHED_NXDOMAIN?
Let’s get through the steps to solve this Google Chrome error one by one.
How to Fix Google Chrome Error DNS_PROBE_FINISHED_NXDOMAIN On Windows?
- Releasing & Renewing IP Address
- Restarting DNS Client Service
- Changing DNS Servers
- Resetting Google Chrome Flags
- Disable VPN and Antivirus Temporarily
- Verify Local Hosts File
- Verify DNS of Your Domain
- Restarting Your Computer
1. Releasing & Renewing IP Address
- Open Command Prompt from Windows Run box. For that, type “cmd” and hit the Enter button.

- Once the command prompt opens, type the command: ipconfig /release and hit Enter. It’ll release your present IP address.

- Now, type: ipconfig /flushdns and hit Enter button. This command will flush your local DNS cache. If it’s done correctly, you’ll receive a message “Successfully flushed the DNS resolver Cache.“

- Now, type another command: ipconfig /renew and hit Enter button. It’ll renew your IP address.

- However, you can also reset your IP settings and Winsock catalog through commands: netsh int ip set dns & netsh winsock reset.
- Or else you can even flush and renew your DNS by disabling and re-enabling network adapter.
2. Restarting DNS Client Service
- Now, go to the Windows Service Manager. For that open Run Box and type “services.msc” and hit the Enter button.

- Now, search and select “DNS Client” and right-click on it and select the option “Restart.”

- In case the Restart button is disabled, then another option is through the command prompt.
- Type “cmd” in the Windows Run Box and click the “OK” button.
- Now, enter the following command:
net stop dnscache
 net start dnscache
For example, you can face an error message like The requested pause, continue, or stop is not valid for this service.
3. Changing DNS Servers
For changing DNS Servers, follow the below steps:
- Open Control Panel

- When the control panel opens, select and open “Network and Internet” and then “Network and Sharing Center” and in that select “Change Adapter Settings.”

- Now, select and right-click your current internet connection, depending upon the one you have, Local Area Connection (LAN) or Wireless Network Connection based upon how you connect. Now, click “Properties.”

For changing DNS Servers, follow below steps:
- Go to Wireless Network Connection Properties. From that, select the Networking tab. Now, select Internet Protocol Version 4 (or Version 6) and finally “Properties” button.

For instance, here we’re using Google’s Public DNS IP Addresses:
- For IPv4: 8.8.8.8 and 8.8.4.4
- For IPv6: 2001:4860:4860::8888 and 2001:4860:4860::8844

- Now, click the OK button and restart your browser.
4. Resetting Google Chrome Flags

5. Turning Off Antivirus or VPN
6. Verify URL of the Website

7. Verify Local Hosts File
To open and edit Local Hosts file:
- Open any text editor. For example, Notepad and locate the host file:
C:\Windows\System32\drivers\etc\- Now, select All Files (*.*) option and from the list open file named: hosts

8. Restarting Your Computer
How to Fix Google Chrome Error DNS_PROBE_FINISHED_NXDOMAIN On Mac?
- Releasing & Renewing IP Address
- Modification of DNS Servers
- Verification of Local Hosts File
1. Release & Renewal of IP Address
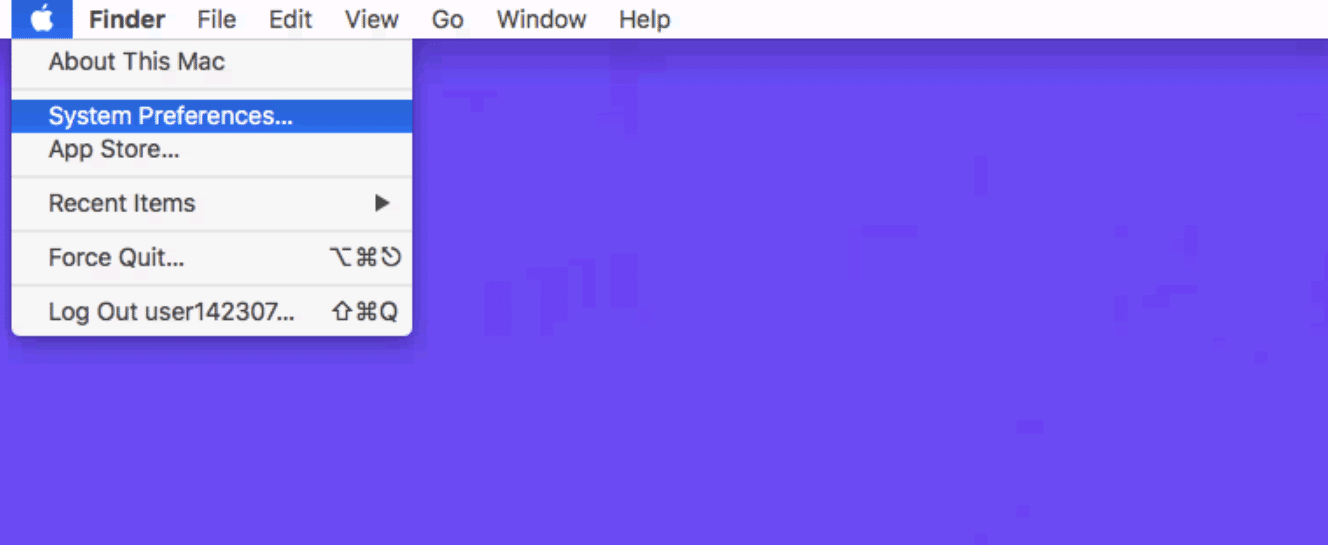
- Go to System Preferences
- Select the Advanced option, once you click the network icon.
- Click “Renew DHCP” from the TCP/IP tab.
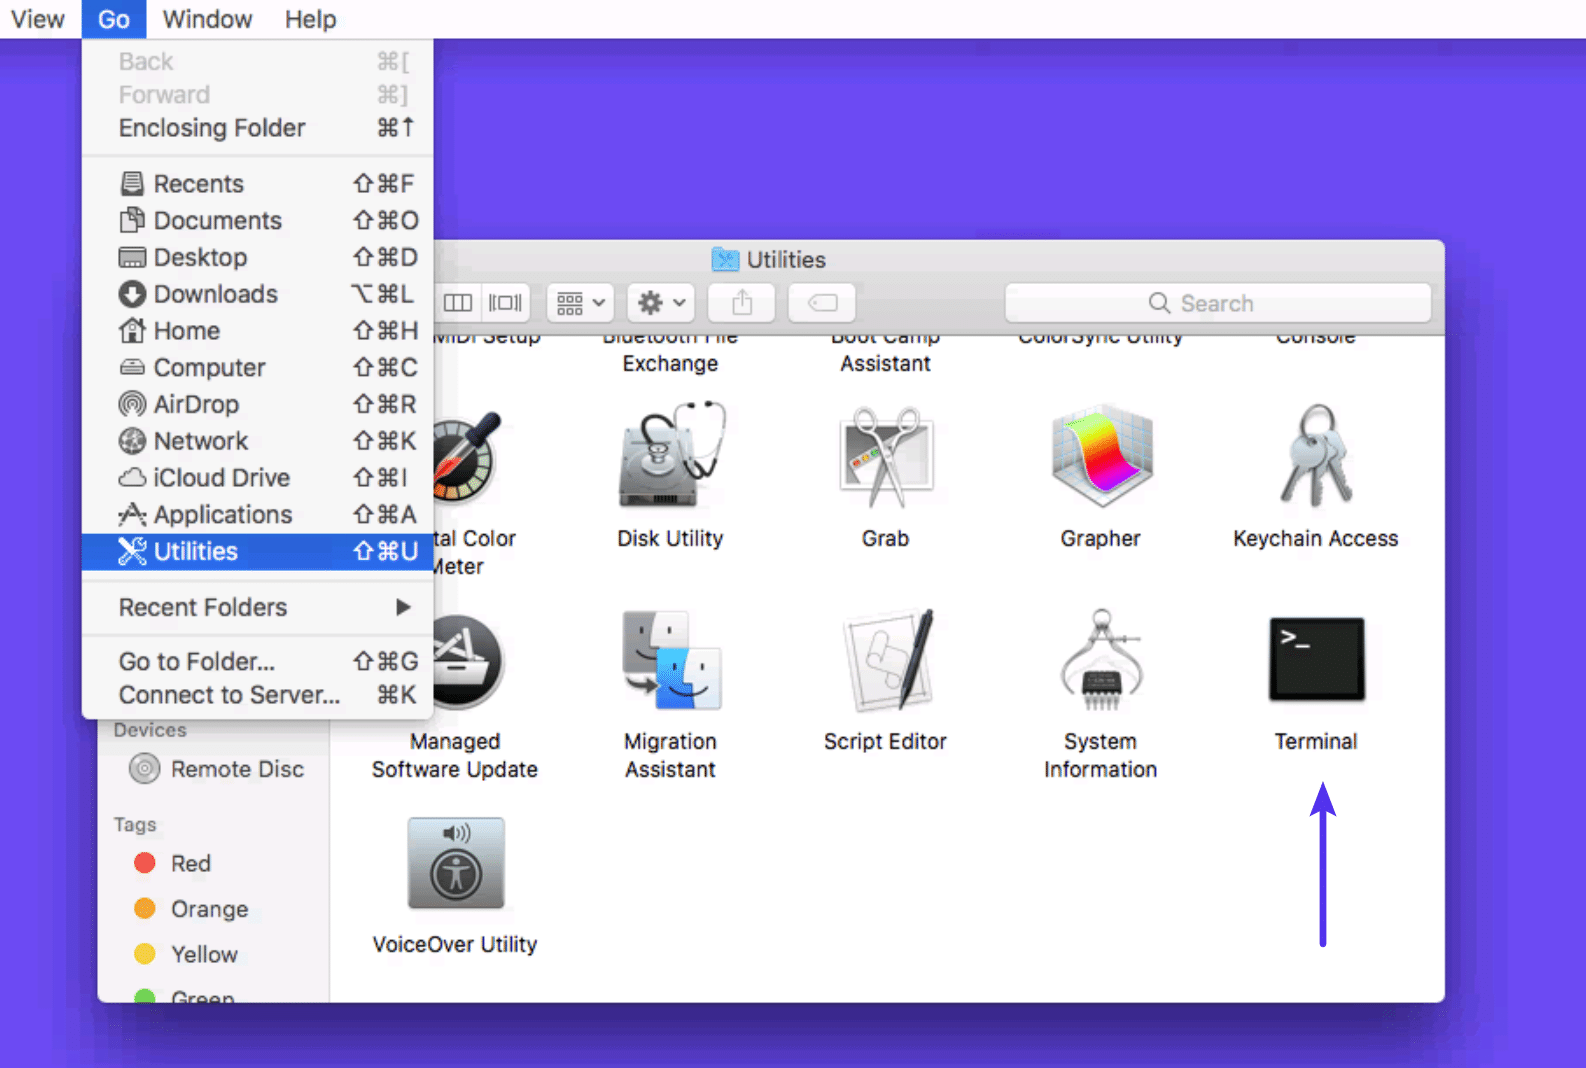
- Go to Utilities and select Terminal
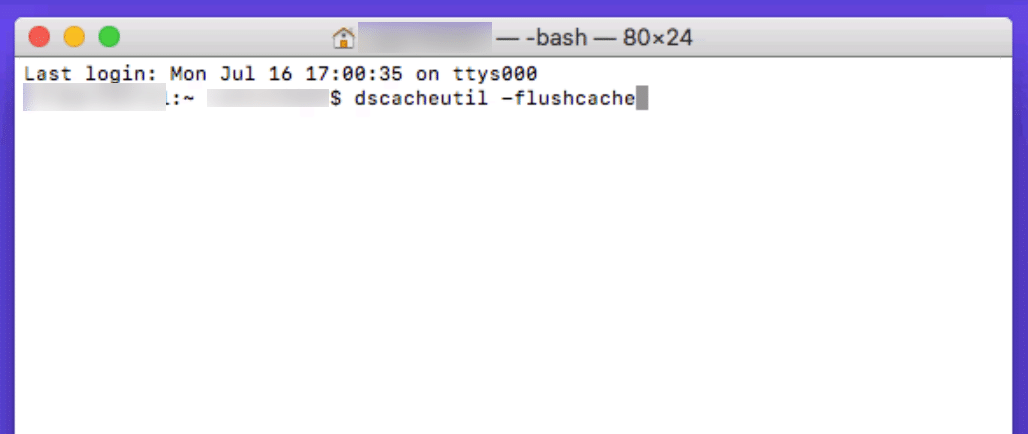
- Now, enter the command: dscacheutil -flushcache
2. Modification of DNS Servers
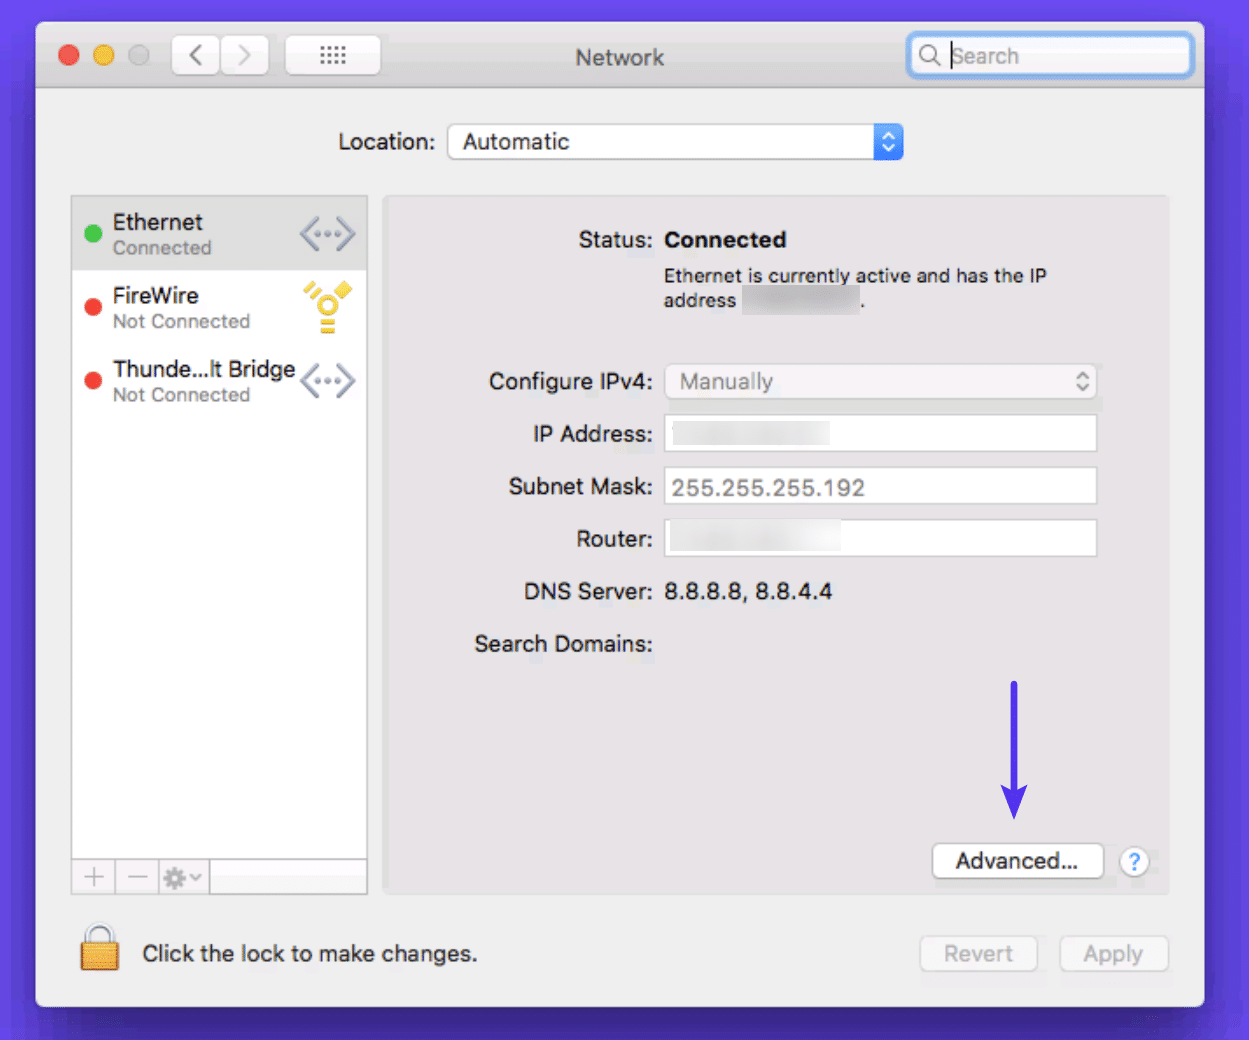
- Go to System Preferences
- Click the “Advanced” button from the Network.
- Select, DNS tab
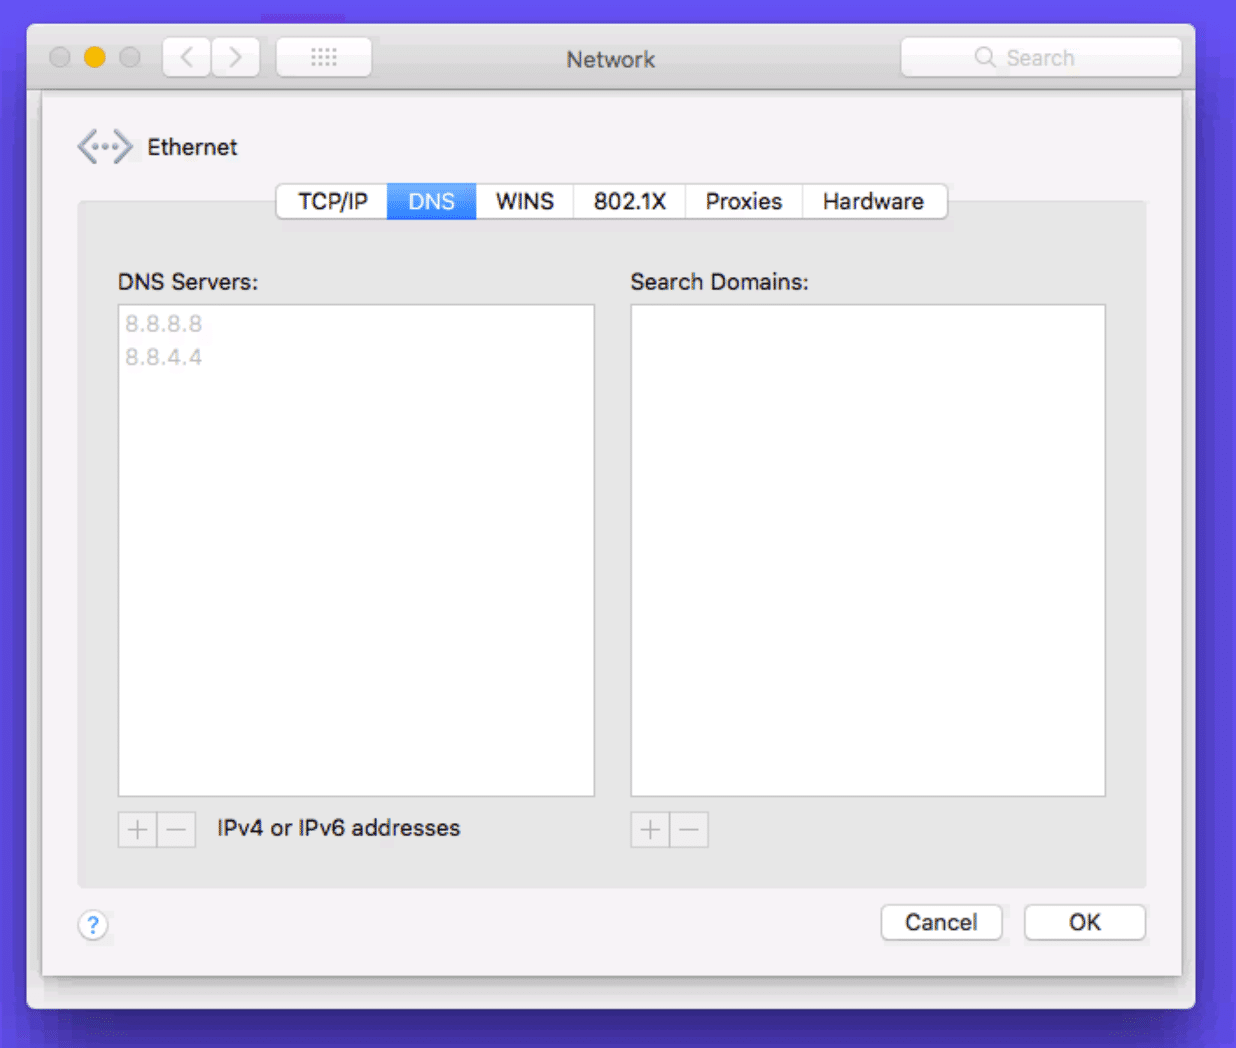
For instance, Google’s Public DNS IP Addresses:
- For IPv4: 8.8.8.8 and 8.8.4.4
- For IPv6: 2001:4860:4860::8888 and 2001:4860:4860::8844
3. Verification of Local Hosts File
- From the above menu, select “Go” then “Utilities.” Once Utilities open, select, and click “Terminal.”
- Once the Terminal opens, enter the below command and hit the Enter button.
sudo nano /private/etc/hosts
Now, make sure the website you’re trying to visit is not recorded in the host file. If it’s listed, then remove it.
How to Fix Google Chrome Error DNS_PROBE_FINISHED_NXDOMAIN On Android?
- Changing DNS Settings
- Flushing DNS Cache
- Reinstalling Your Google Chrome App
1. Changing DNS Settings
- From your device select Settings > Wi-Fi >
> Modify network. Select, Show advanced options. Now, look for IP settings and make its value Static. Finally, you can perform this optional step of changing DNS settings to 8.8.8.8 and 8.8.4.4 for another DNS option.
2. Flushing DNS Cache
In case your Android phone is with a non-removable battery, then follow the below steps:
- Go to the Google Chrome app.
- In the URL address bar enter: chrome://net-internals/#DNS
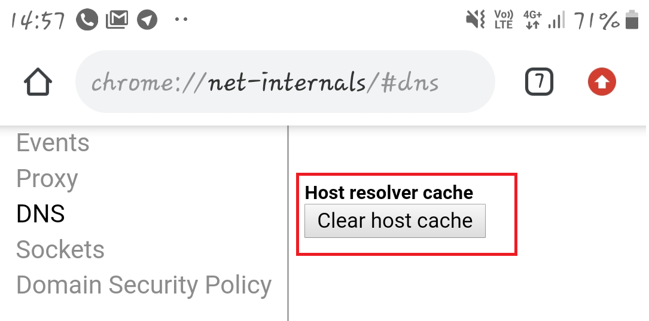
- Now, select the option DNS from the left menu bar.
- And click the Clear host cache button.
- Now, click back arrow and select the option “Clear Cache” and “Flush Sockets.”
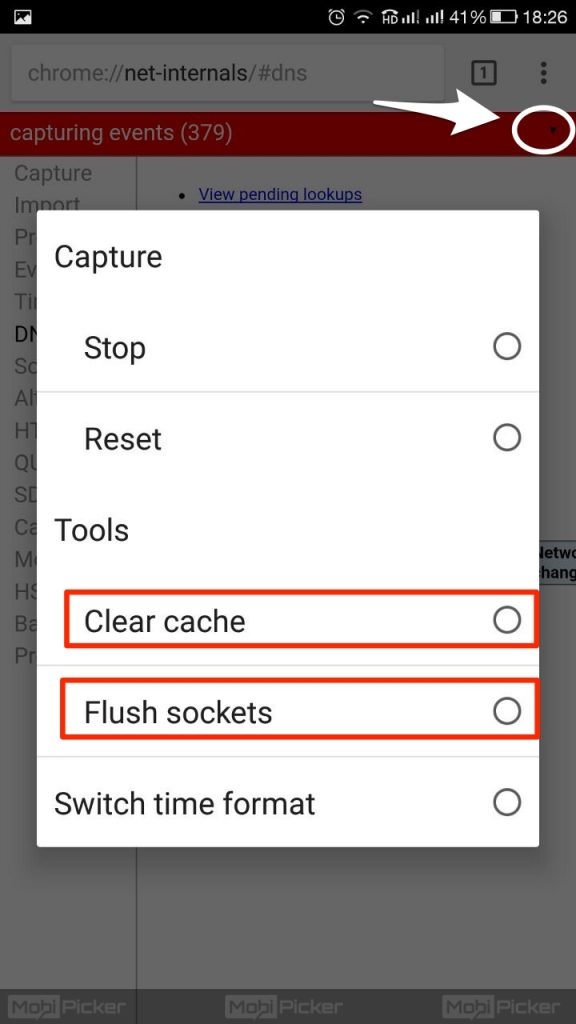
- Lastly, restart your Chrome app.
3. Reinstalling Your Google Chrome App
Here’s How Google Chrome Error Message: DNS_PROBE_FINISHED_NXDOMAIN Is Display In:
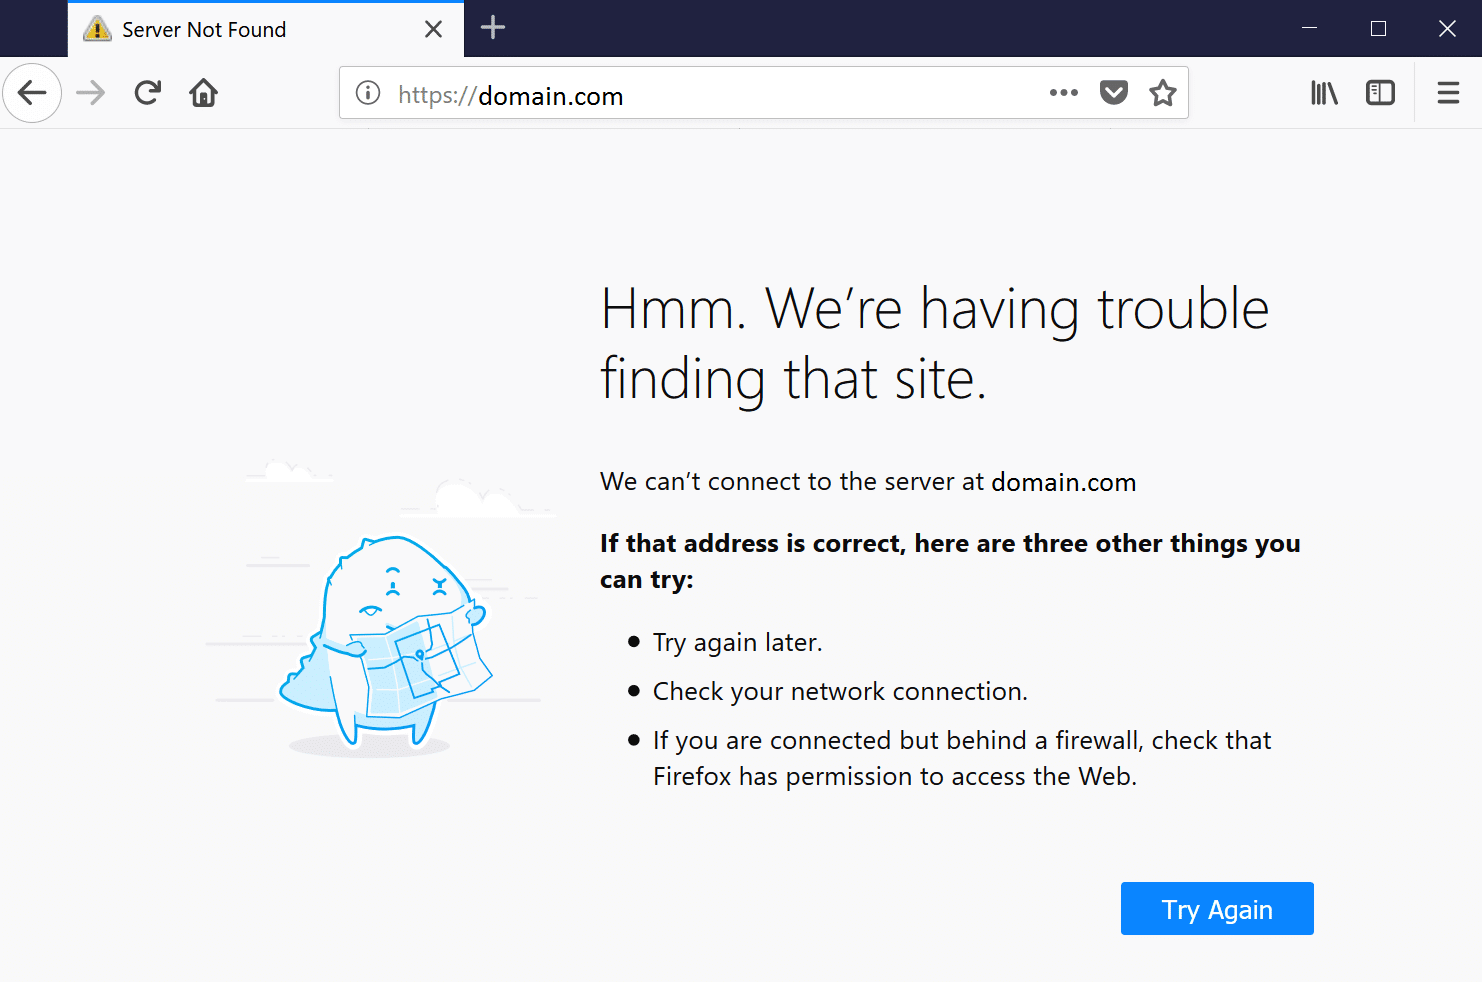
Mozilla Firefox
Hmm. We’re having trouble finding that site
along with
We can’t connect to the server at domain.com.
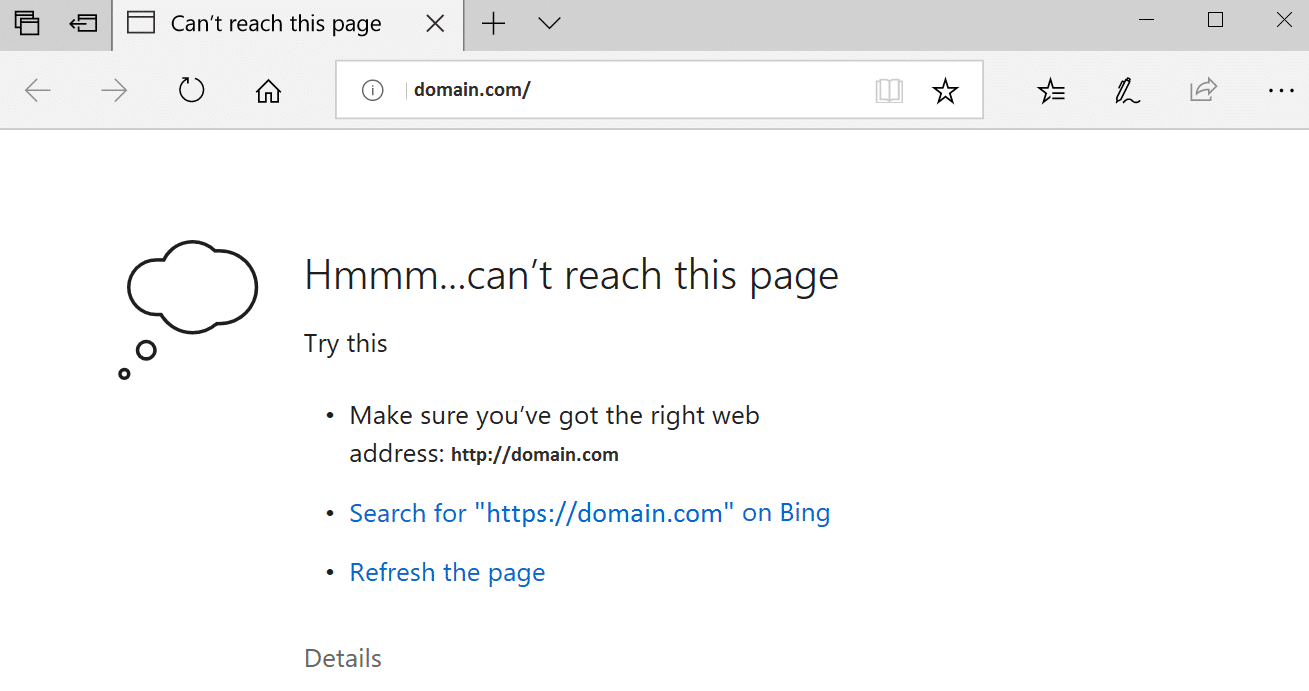
Microsoft Edge
Hmmm… can’t reach this page
along with the message
Make sure you’ve got the right web address: domain.com.
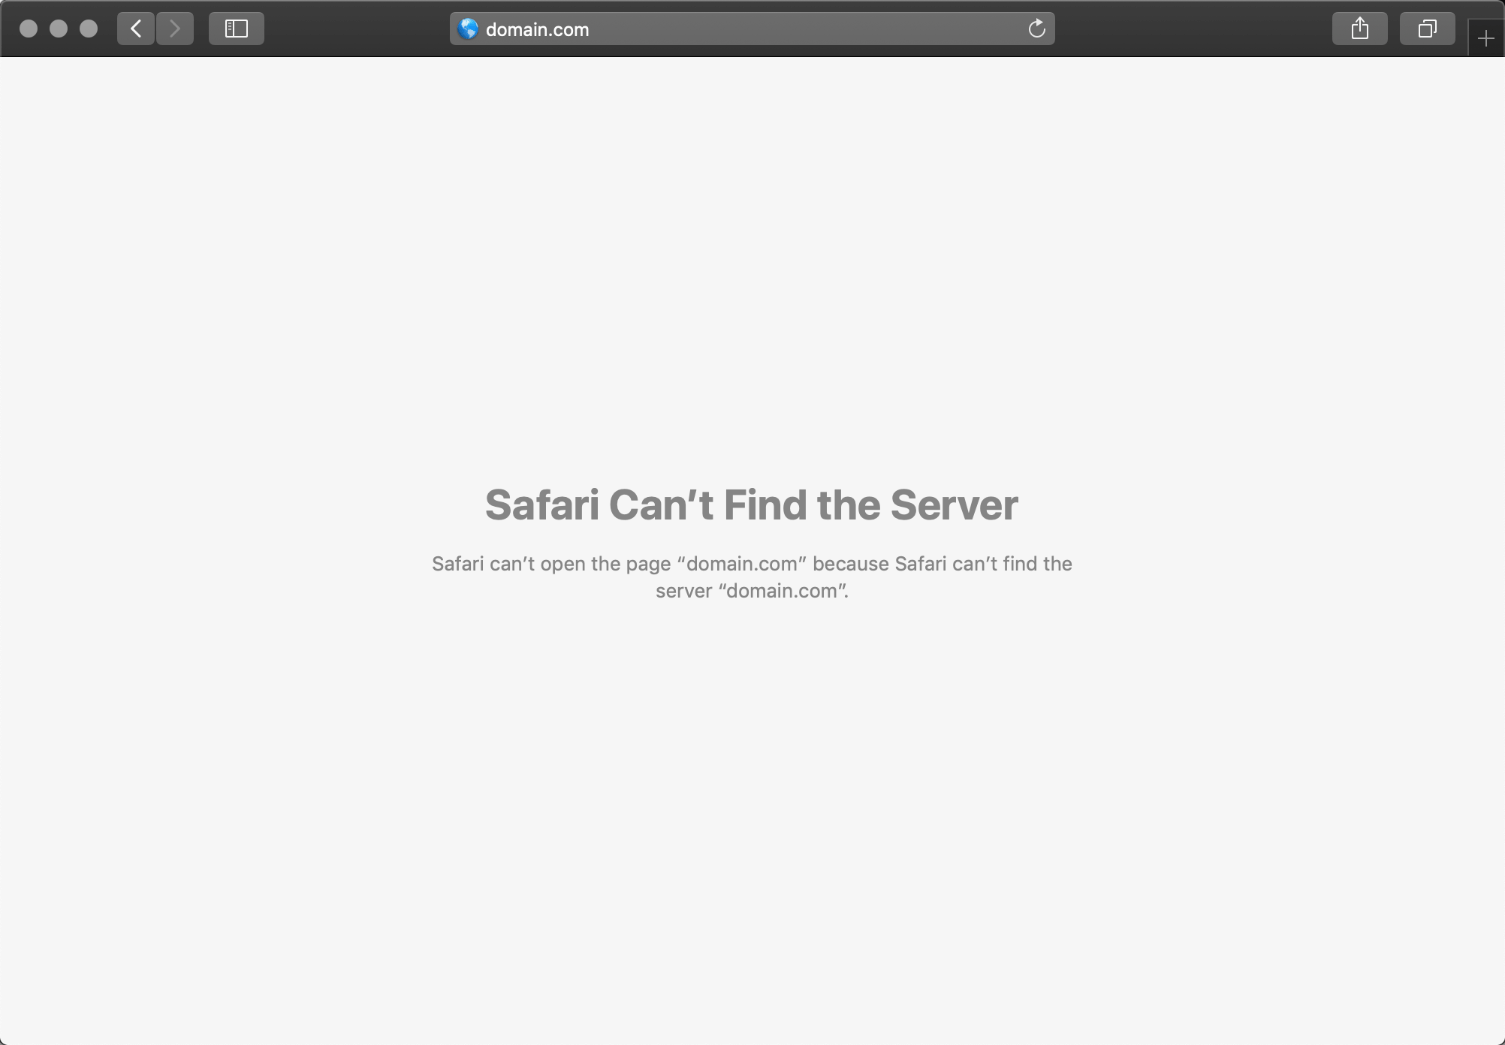
Apple Safari
Safari Can’t Find the Server
along with
Safari can’t open the page “domain.com” because Safari can’t find the server “domain.com”.
Summary
No matter which error we face, whether it’s DNS PROBE FINISHED NXDOMAIN or any other. It does become annoying if the website becomes inaccessible. However, it’s one of the commonly faced error messages of the Google Chrome which is faced by the users, and here in this article, we’ve given steps to resolve this Google Chrome error message: DNS_PROBE_FINISHED_NXDOMAIN for Windows, Mac, and Android along with how it looks like in other browsers namely Mozilla Firefox and Microsoft Edge.
In case if you’ve been able to solve this Error code: DNS_PROBE_FINISHED_NXDOMAIN in any other way, then please share with us in the comment section below.
Related SSL Errors and Troubleshoot Guide:
- How to Fix Firefox Error – “MOZILLA_PKIX_ERROR_SELF_SIGNED_CERT”?
- How to Fix the SEC_ERROR_EXPIRED_CERTIFICATE Error in Firefox?
- How to Fix the SSL_ERROR_RX_RECORD_TOO_LONG Error on Mozilla Firefox?
- How to Fix NET::ERR_CERT_REVOKED Error in Mozilla Firefox?
- Fix Cannot Connect to Real Google SSL Error