How to Fix ERR_TUNNEL_CONNECTION_FAILED in Google Chrome
Here Are the Step-by-Step Guide to Solve Net Err_Tunnel_Connection_Failed in Chrome Browser
Google Chrome is among the popular web browsers used throughout the world like Mozilla Firefox. If you’re someone who surfs the internet regularly, then you might already have an idea that this popular browser Google Chrome does show some error messages from time to time. And the reason behind it is not one particular.
Among the Google Chrome error messages pool, one of the quite commonly seen error messages is ERR_TUNNEL_CONNECTION_FAILED. But, before jumping into the solution, let’s understand what this Google Chrome error message means.

What’s Err_Tunnel_Connection_Failed Chrome Error Message?
Put simply, Err Tunnel Connection Failed message is displayed when Google Chrome browser fails to create a tunnel that connects to the website host user is trying to open or else Chrome fails to connect to the internet. The main reason behind facing this Net Err_Tunnel_Connection_Failed is using a proxy for connecting to the internet.
Sometimes other reasons for which this error message gets displayed on Chrome browser are browsing data and cookies saved in Chrome, incorrect website domain configuration, conflicting browser data, DNS connection issue, or incorrectly entered proxy settings. It doesn’t matter what’s the issue is. The method to fix this error message is quite easy.
Guide to Fix Err_Tunnel_Connection_Failed in Google Chrome Browser
Fix 1 – Disabling Proxy Setting
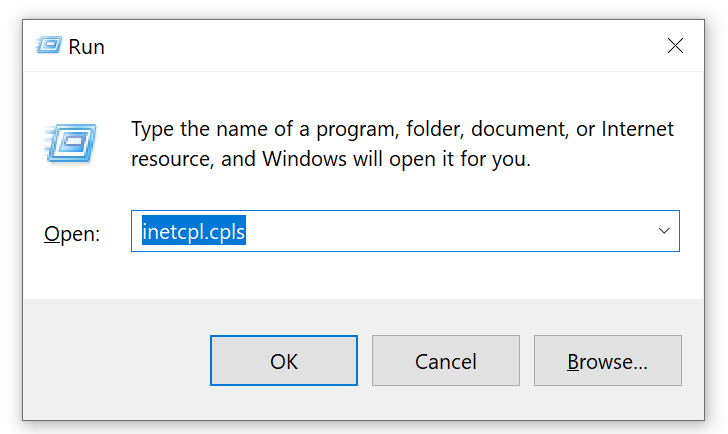
- Press Windows Key + R from the keyboard, and it’ll open RUN
- Type, inetcpl.cpl in RUN and press Enter or click OK button.
- Once Internet Properties opens, click on Connections Tab
- Select and Click the option LAN Settings.
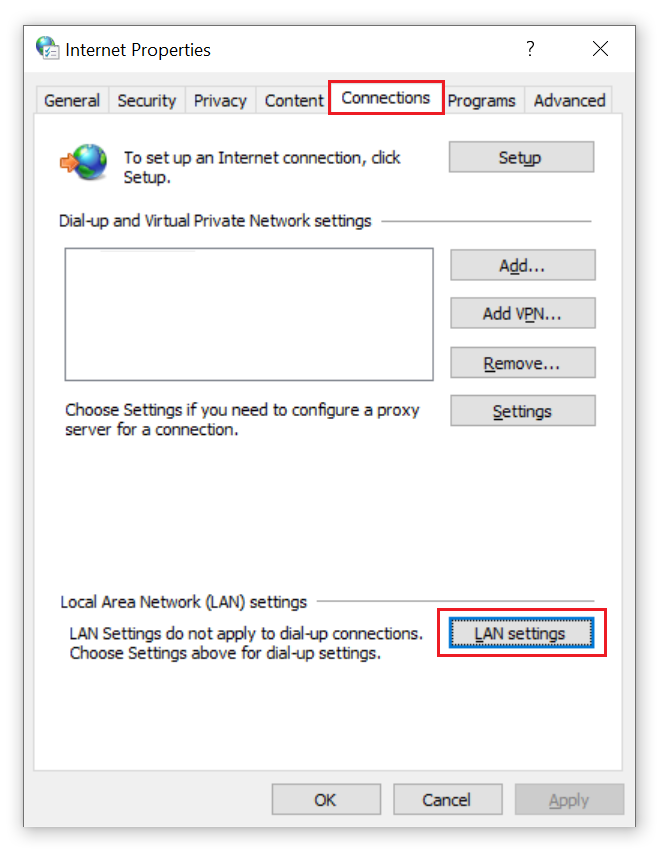
- Once you click LAN settings, a separate window will open, and there you’ll require to unselect the option “Use a proxy server for your LAN.” And ensure that the “Automatically detect settings“ option is selected. Now, click the OK button to apply the settings.

Fix 2 – Resetting Network Setting
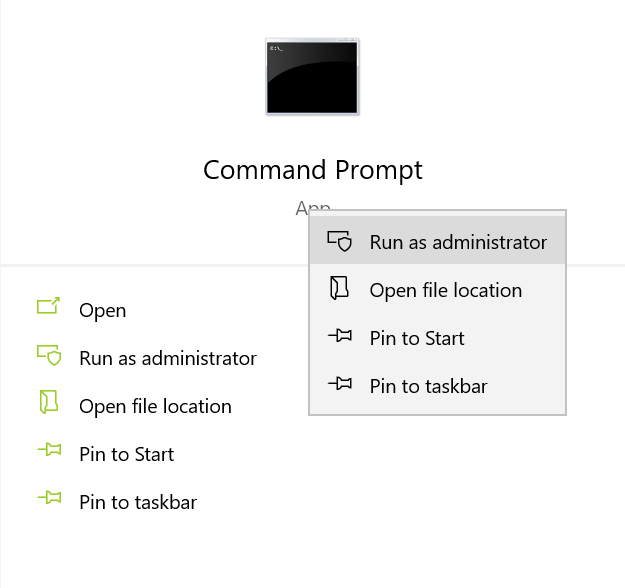
- Open your command prompt in an Administrator mode. Go to the Start menu by pressing the Windows button and typing Command Prompt in the Start Search bar. Once the command prompt appears in the search result, right-click on it and select and press the Run as Administrator option in that right-click menu.
IPCONFIG /FLUSHDNS
NBTSTAT –R
NETSH INT IP RESET
NETSH WINSOCK RESET
Once the command executes successfully, restart your computer. Now, open Google Chrome and ensure whether this Err_Tunnel_Connection_Failed is fixed. If not, try another below-mentioned method.
Fix 3 – Changing DNS Address
If that’s the case, you can try setting the DNS address on your PC to the Google DNS server address. And to do so, follow the below steps:
- Select the Network icon from the Taskbar that’s located on the bottom right side of your computer screen. The same icon that allows you to connect with the WiFi network through your PC. Now, right-click on that Network icon, and from that, select the Open Network and Sharing Center option and open the Network and Sharing Center window.
- Once the Network and Sharing Center window opens, go to the option, View your active networks section. Now, click on the network you’re currently connected with.

- It’ll open the Internet Connection Status. In that window, click on the Properties option.

- Once you click on the Properties window, in that select Networking tab and find the Internet Protocol Version 4 (TCP/IPv4) option from that provided list and double click on it.

- Once you open that IPv4, you’ll be able to see whether the DNS is set to obtain automatically or else set to some other provided value. Either way, ensure that one of the DNS server address options is selected. Once it’s done, manually enter the below Google public DNS server address:

Now, restart your computer, open the Google Chrome browser, and ensure whether the issue is solved. If not, then go for the below solution.
Fix 4 – Clear Browsing Data
- In the Google Chrome URL bar, type Chrome://settings and press the Enter button. It’ll open the Settings option of Google Chrome. Otherwise, you can also try opening Chrome’s menu and from that select Settings option.

- Scroll down to the Settings and click the Advanced option.
- Once you click the option Advanced, from that select Privacy and Security section, select and click the option Clear Browsing Data.
- It’ll open a new window. From that, select the data you’re looking to clear from the Chrome browser. Or else, select all the items from the drop-down menu Clear the following items from, select the option All Time. Now, click the button Clear Data.

Fix 5 – Reset Google Chrome Settings
- Follow the first two-step of the 4th solution; that’s to open advanced settings.
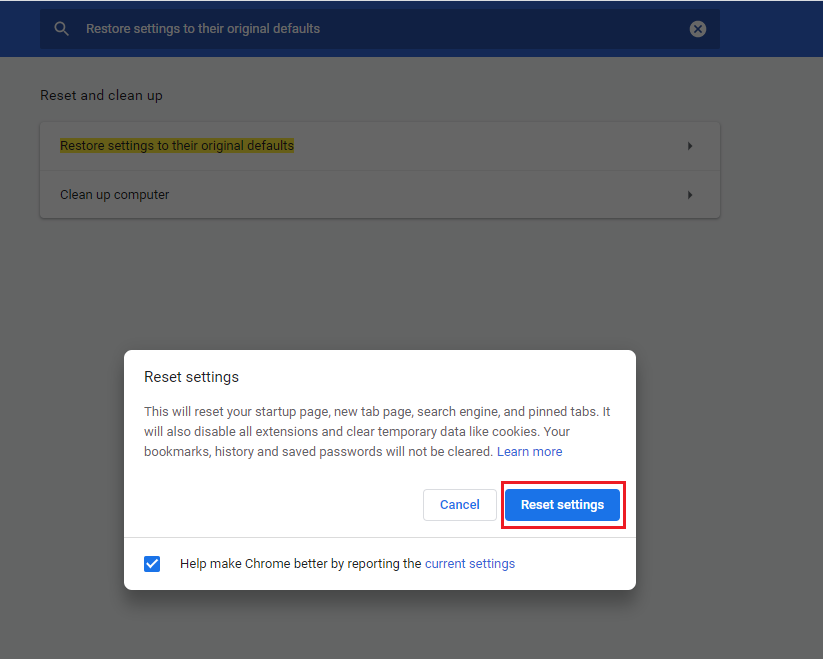
- From Advanced Chrome settings, click the Reset and clean up section. Now, click on the Restore settings to their original defaults option. It’ll seek confirmation that you want to reset your browser. Once you Confirm and the Reset is completed, close and restart your Chrome browser and see if the error is persisting or solved.
Fix 6 – Update Chrome Browser
- Open Google Chrome, and from the upper right corner, click on the three dots. Go to the Help section and click on the About Google Chrome option.
- New window will open from your Chrome browser. From that, start looking for a newer version. If it’s available, then you’ll get an option to update your browser. Now, initiate the update and restart your Chrome browser once the update is completed.

Fix 7 – Conflicting Browser Extensions
Conclusion
Here, we’ve mentioned seven different solutions, go through it, and find the right one accordingly. Still, it’s also recommended that before you try these solutions, it’s best that you first check this error message is only with the Google Chrome browser and not any other browser.