How to Create a Self Signed Certificate in IIS
SSL establishes trust and ensures customers for a safe visit and transactions over the net. We highly suggest you not to use a self-signed certificate for any e-commerce site or any other sites which require sensitive data like bank or credit card information. If you want to generate self-signing ssl certificate in IIS, follow the below steps.
Step-by-step Guide to create a Self Signed Certificate in IIS
Step: 1 Go to the Start menu & click on Administrative Tools > Internet Information Services (IIS) Manager
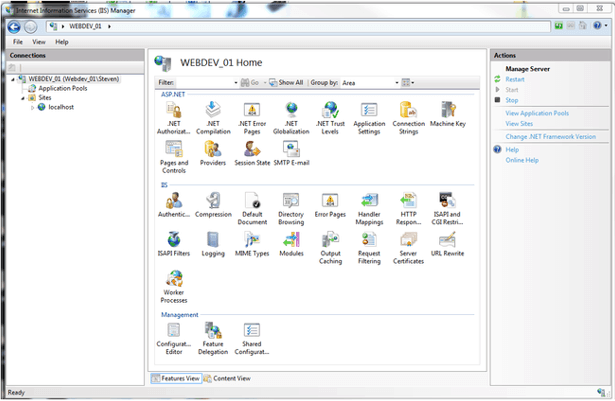
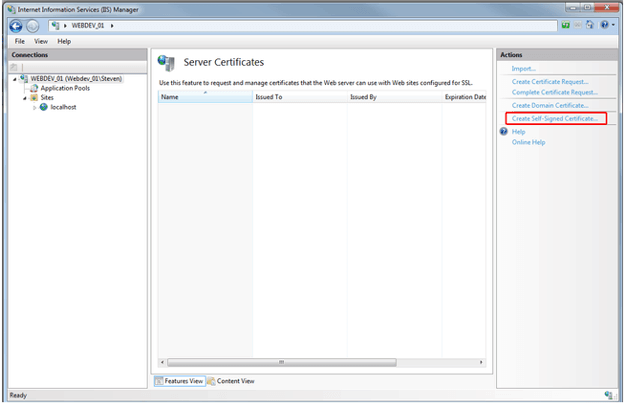
Step: 2 Click on the server name in the Connections column on the left and Double-click on Server Certificates

Step: 3 Click on Create Self-Signed Certificate in the Actions Column on the right.
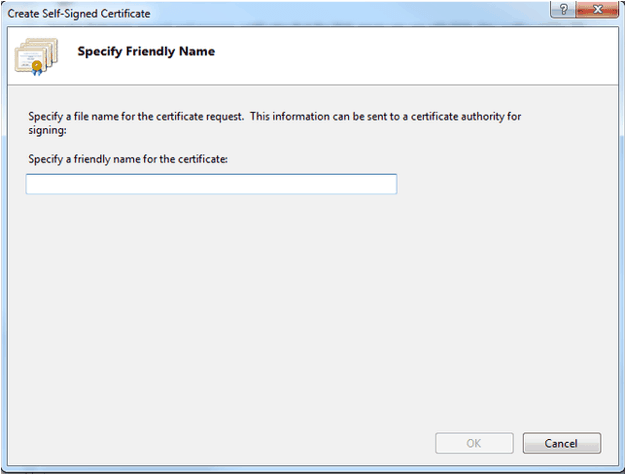
Step: 4 Type any meaningful name and then click OK to proceed
Step: 5 Click OK. Once that is complete you should now see the SSL in the list of Self-Signed certificates. Now, you have IIS Self-Signed Certificate with 1 year validation.
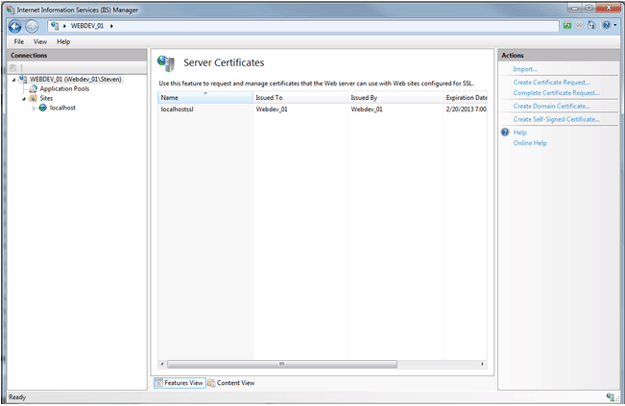
Conclusion: Finally, by following the above step your Self-Signed Certificate is ready in the IIS.